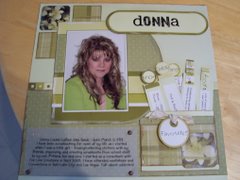
Have you found yourself staring at a giant stack of photos wondering how you'll ever put together your first page—let alone an entire book? Here are seven basic "how to's" that will make creating scrapbook pages a snap.
1.
Sort your photos and select a theme to work on (generally, 5-7 photos fit on a two-page spread and 3-5 photos fit on a single page). Keep in mind that you don't have to scrapbook every photograph—select only the best photos to highlight the event, feeling or moment you want to convey.
2.
Select 2-3 colors of safe paper that will complement colors found in the photographs. Experiment with different color combinations to find the perfect colors to enhance your photographs. You may want to include stationery or decorative paper that supports the theme of your pages.
3.
Choose a photo to be your focal point. As a general rule, select photos with sharp images, vivid colors and well-lit subjects.
4.
Shape and mat your photos to add extra prominence to your focal point. You can do this easily by matting your photo with a wider border than the others, or double or triple-matting it. While shaping your photos, keep in mind that simple shapes such as rectangles, ovals, circles and squares are among the most eye-pleasing shapes. If irrelevant or distracting details appear in the background, simply trim them out. Keep in mind that this doesn't mean you have to cut out all of the background—frequently, ordinary items pictured in the background will bring a flood of memories essential to journaling and reminiscing.
5.
Add journaling. No page is complete without adding your thoughts, feelings and experiences. Take a few minutes to write down not only the "who" and "when," but also the "what" and "why."
6.
Arrange photos, journaling and titles on your page. As you arrange these elements, pay close attention to the direction your eye moves. In general, well-designed pages are well balanced and will follow a natural flow that mimics the letter Z. To check the balance, imagine that your layout is on a scale. Does one side tip the scale? Once you're pleased with the layout, simply adhere the elements to the page.
7.
Try a few extras. As you get more comfortable with scrapbooking, try your hand with some embellishments—stickers, die cuts, rubber stamps and punches are among the most popular page accents. Use these items sparingly—you don't want them to overpower your photos.
Congratulations! You've successfully completed your first scrapbook page without a hitch. You'll find that as you scrapbook more and more, you will develop your own style, but these tried-and-true basics will serve as a strong foundation. Happy scrapping!
How to Mat Your Photos
1. Decide on the shape of your photo.
2. Using acid-free and photo-safe adhesives, adhere the photo onto a piece of cardstock or decorative paper that is slightly larger than your photo.
3. You can vary the widths of the paper borders to add more or less prominence to the photo. For variety, try cutting your paper with decorative-edged scissors.
Subscribe to:
Post Comments (Atom)


No comments:
Post a Comment